
Ever wish you could wake up to the aroma of freshly baked bread without the early morning hassle? Prepare your dough the night before and let it rise effortlessly while you sleep, waking up to perfect bread. That’s the beauty of an Overnight Bread Recipe!
This no-fuss method allows the dough to develop incredible flavor and texture, thanks to a slow fermentation process. With minimal effort and just a few ingredients, you get bakery-quality bread at home, crispy on the outside, soft and airy on the inside. Whether you’re a busy professional, a home cook, or a bread lover, this recipe will transform your mornings with ease and deliciousness!
Table of Contents
The Science Behind Overnight Bread
Understanding the magic of an Overnight Bread Recipe starts with science. Slow fermentation isn’t just about convenience, it transforms the dough, enhancing both flavor and texture while making the bread easier to digest. Here’s why this process works so well.
How Slow Fermentation Enhances Flavor and Texture
When you let the dough rise overnight, natural yeast and bacteria have more time to break down complex carbohydrates. This extended fermentation process creates deeper, richer flavors with subtle hints of nuttiness and sweetness. It also improves texture, resulting in a crisp crust and a soft, airy crumb.
The Role of Gluten Development
Gluten forms naturally when flour meets water, but time strengthens its structure. As the dough rests, gluten proteins align and create elasticity, giving the bread its characteristic chewiness. This means you get a well-structured loaf without excessive kneading.
Benefits of Long Fermentation
Long fermentation does more than enhance taste and texture; it also improves digestibility. The extended process breaks down phytic acid, making nutrients more accessible to the body. Additionally, slow-risen bread has a lower glycemic index, keeping you fuller for longer.
By using an Overnight Bread Recipe, you’re not just making bread; you’re crafting a flavorful, nutritious loaf with minimal effort.
Essential Ingredients for the Perfect Overnight Bread
Making the perfect Overnight Bread Recipe starts with choosing the right ingredients. Each one plays a crucial role in flavor, texture, and fermentation.
Choosing the Right Flour
Flour is the foundation of your bread. Use high-quality bread flour for a strong gluten structure, which gives the bread its chewiness. If you prefer a rustic texture, try whole wheat or rye flour for added depth of flavor.
The Importance of Water Quality
Water activates the yeast and hydrates the flour. Use filtered or spring water to avoid chlorine and impurities, which can affect fermentation. The right water ensures a smooth, well-developed dough.
Yeast and Salt: Their Role in Fermentation
Yeast makes the dough rise by producing gas during fermentation, while salt controls yeast activity and enhances flavor. Use the right balance. Too much yeast can speed up fermentation, and too little salt can make the bread taste flat.
With these simple but essential ingredients, your Overnight Bread Recipe will turn out perfect every time!
Step-by-Step Guide: Crafting Your Overnight Bread Recipe
Making the perfect overnight bread recipe is easier than you think. With just a few simple steps, you can create a delicious homemade loaf with a crispy crust and soft, airy interior. Follow this step-by-step guide for best results.
1. Mixing the Dough
Begin with the essentials: flour, water, yeast, and salt.
- Measure your ingredients accurately to maintain consistency.
- In a large mixing bowl, combine the flour and salt, then mix well.
- In a separate container, dissolve the yeast in water (room temperature or slightly warm).
- Gradually add the water-yeast mixture to the flour, stirring with a wooden spoon or your hands until a shaggy dough forms.
- Avoid over-mixing—this dough doesn’t need kneading! Time will do the work.
Once combined, cover the bowl with a damp towel or plastic wrap. Let it rest for 20-30 minutes to allow the flour to fully absorb the water, which improves texture and gluten development.
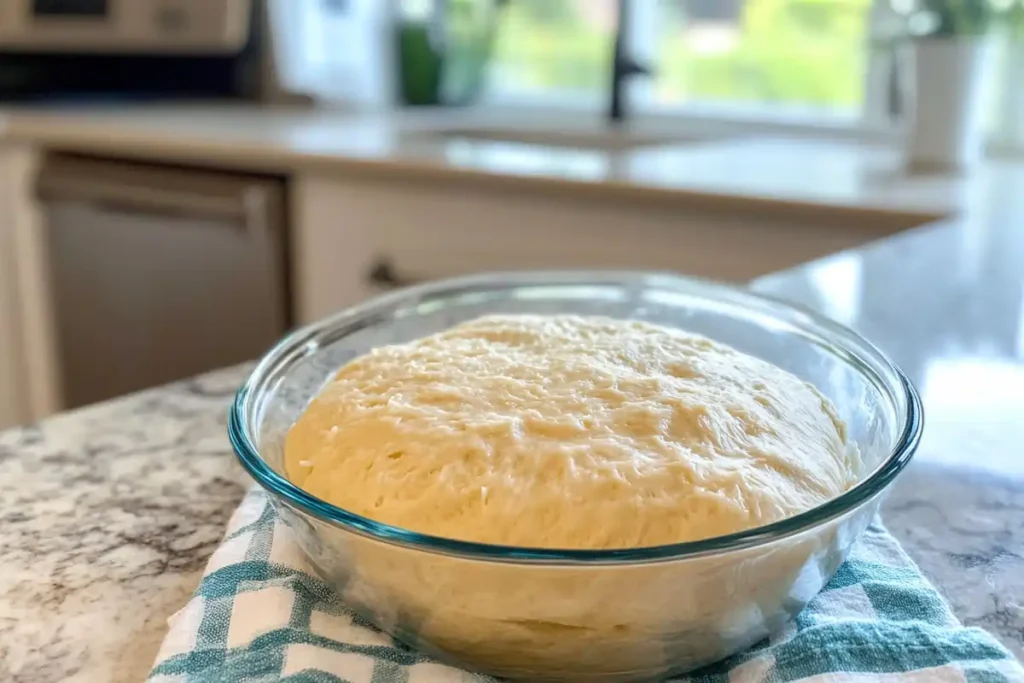
2. Bulk Fermentation: Letting Time Do the Work
This is where the magic happens. Overnight fermentation enhances flavor, texture, and digestibility.
- Leave the covered dough at room temperature for 12 to 18 hours.
- During this time, yeast slowly ferments the flour, creating gas bubbles that give the bread its airy structure.
- Optionally, you can stretch and fold the dough every few hours to strengthen the gluten and improve texture. Simply grab one side, stretch it upward, and fold it over—repeat on all four sides.
By morning, your dough should have doubled in size and developed a slightly domed, bubbly surface. It’s now ready for shaping!
3. Shaping and Proofing the Dough
Shaping gives your bread structure, while proofing ensures a perfect rise before baking.
- Lightly flour your work surface and gently turn out the dough.
- Avoid deflating it too much, handle it with care to retain those beautiful air pockets.
- Gently shape the dough into a round or oval loaf, tucking the edges under to create surface tension.
- Transfer the dough to a floured proofing basket or a bowl lined with a floured kitchen towel.
For the final proofing:
- Cover and let it rest for another 30–60 minutes at room temperature.
- If you want to bake later, refrigerate the dough for up to 12 hours—this enhances flavor even more!
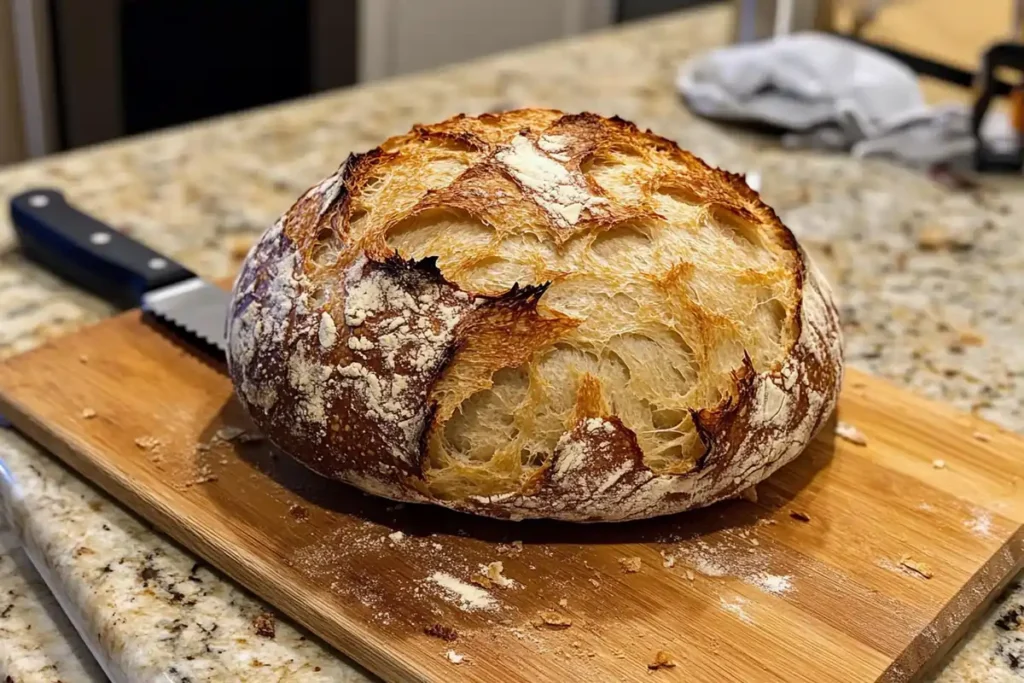
4. Baking to Perfection
Now it’s time to transform your dough into golden, crispy bread.
- Preheat your oven to 475°F (245°C) for at least 30 minutes. In case you have the Dutch oven, put it inside.
- Carefully place the dough onto parchment paper and into the hot Dutch oven or baking tray.
- For a crusty exterior, create steam by adding a pan of hot water to the oven or spritzing the dough with water.
- Score the dough with a sharp knife or razor blade, this allows controlled expansion during baking.
- Bake covered for 25–30 minutes, then uncover and bake for another 10-15 minutes until golden brown.
Your bread is ready when it sounds hollow when tapped on the bottom!
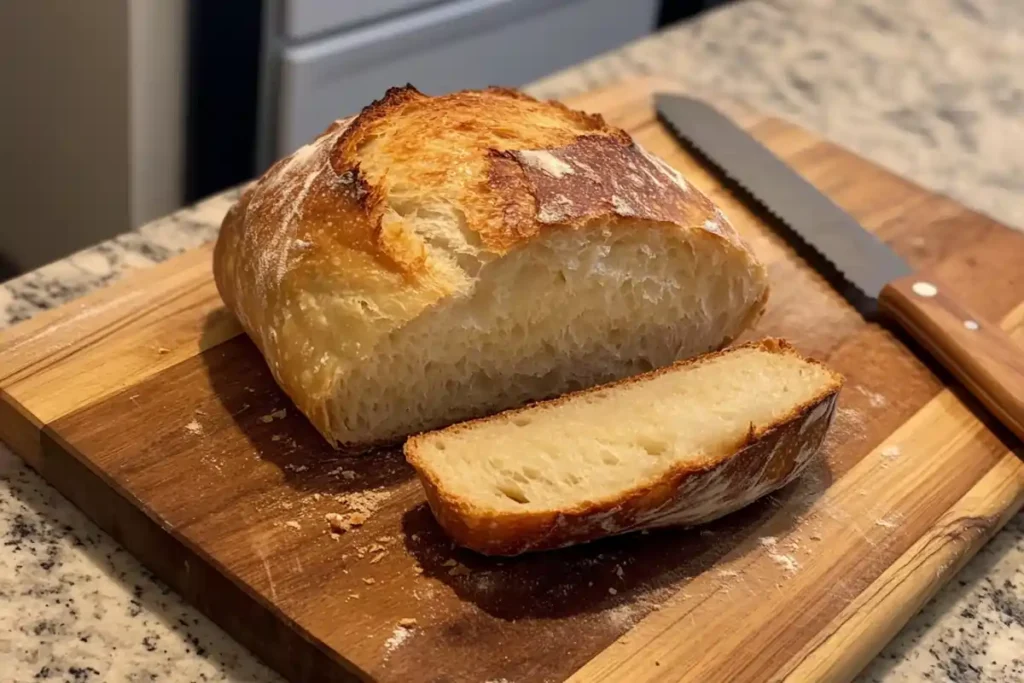
5. Cooling and Storing for Maximum Freshness
Cooling is just as important as baking.
- I advise you to let your bread cool on a rack before slicing it. Cutting too soon releases steam, making the inside gummy.
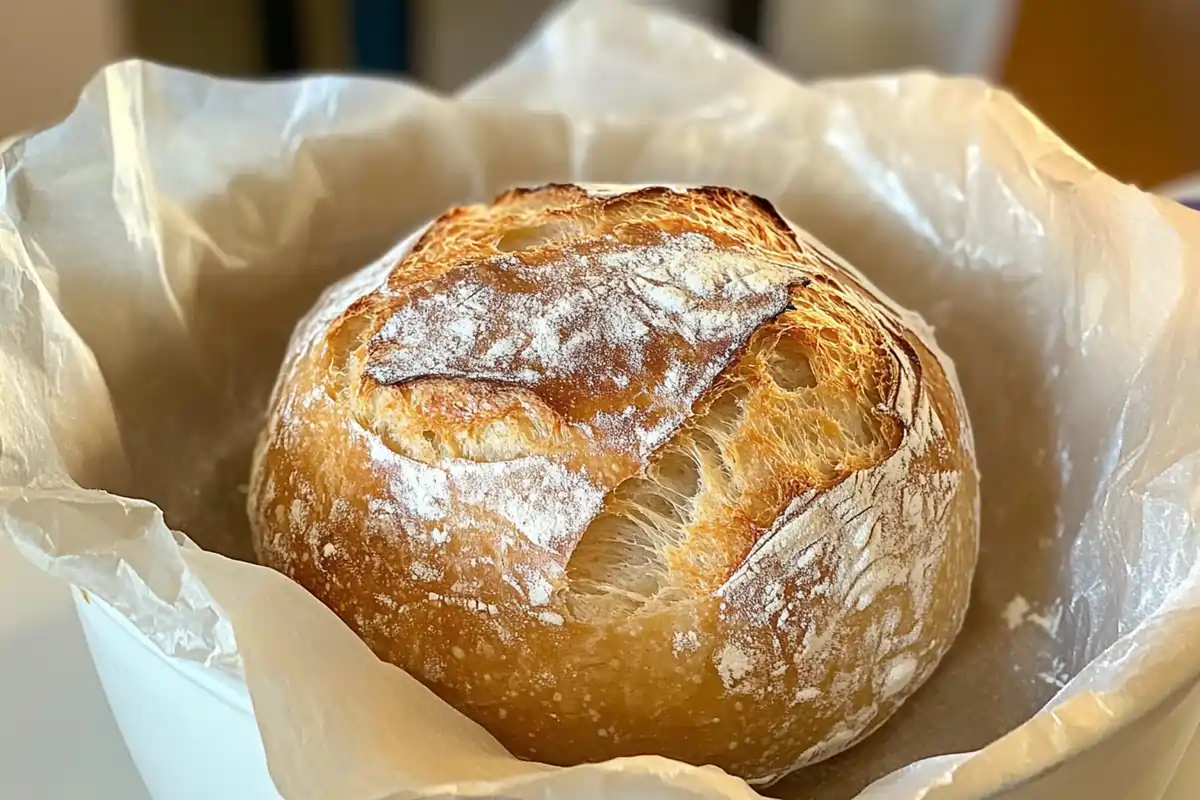
- Store your bread in a paper bag or wrapped in a clean kitchen towel to maintain its crisp crust.
- For longer storage, freeze sliced bread in an airtight bag and reheat as needed.
With this Overnight Bread Recipe, you’ll always have fresh, flavorful bread with minimal effort. Enjoy every bite!
Overnight bread isn’t just great on its own—it’s perfect for delicious breakfast recipes too! Try using it in Perfect Croissant French Toast Overnight for a rich, custardy treat. If you’re wondering how it compares to other bread types, check out Best Bread for French Toast to see why slow-fermented bread makes an excellent choice.
Tips and Tricks for the Best Overnight Bread Recipe
Mastering the Overnight Bread Recipe is simple, but a few expert tips can make your loaf even better. From controlling fermentation to adding extra flavor, these tricks will help you achieve bakery-quality results every time.
Controlling Fermentation Time for Optimal Results
Fermentation time is key to flavor and texture.
- Higher temperatures accelerate fermentation, while lower temperatures slow it down. If your kitchen is warm, reduce the bulk fermentation time to prevent over-proofing.
- For deeper flavor, refrigerate the dough for part of the fermentation—a cold rise develops complex flavors.
- If the dough ferments too long, it can become overly sticky and deflate. Watch for signs of readiness, such as doubling in size and a bubbly surface.
Enhancing Flavor with Add-ins (Herbs, Seeds, Cheese)
Make your Overnight Bread Recipe unique by adding extra flavors.
- Mix in fresh or dried herbs like rosemary, thyme, or basil for an aromatic touch.
- Sprinkle in seeds such as sesame, flax, or sunflower seeds for crunch and nutrition.
- Fold in cheese like cheddar, parmesan, or feta for a rich, savory taste.
- Add ingredients during the mixing stage to ensure even distribution throughout the dough.
Common Mistakes and How to Avoid Them
Even simple recipes have pitfalls. Here’s how to avoid them:
- Too much flour: Don’t add extra flour if the dough feels sticky—it should be slightly tacky for the best texture.
- Skipping the preheat: Always preheat your oven and baking vessel to get a crispy crust.
- Cutting too soon: Let the bread cool completely before slicing to avoid a gummy interior.
Follow these tips, and your Overnight Bread Recipe will turn out perfect every time! 🍞
How My Mother Taught Me to Bake Overnight Bread Recipe
My mother taught me the magic of the Overnight Bread Recipe when I was a child. I remember watching her mix the simple ingredients, her hands moving with ease. “Good bread needs time,” she would say as she covered the dough and let it rest overnight. In the morning, the kitchen smelled warm and inviting as the golden loaf came out of the oven. Now, every time I bake this bread, I feel connected to her, passing down the same tradition with every delicious slice. 🍞💕
FAQs: Answering Your Top Questions on Overnight Bread Recipe
Is it OK to let bread rise overnight?
Yes! Allowing bread to rise overnight enhances flavor and texture. The slow fermentation process helps develop a rich taste while making the bread easier to digest. Just be sure to cover the dough properly to prevent drying out.
Can I prepare bread dough and leave it overnight?
Absolutely! After mixing, let the dough rest at room temperature for 12–18 hours or refrigerate it for an even slower rise. This method requires minimal effort and yields great results.
Is overnight bread better?
Yes, overnight bread has superior flavor, a chewier texture, and a crispier crust compared to quick-rise breads. The slow fermentation process allows the gluten and natural sugars to develop fully.
Can you make bread the night before?
Yes! You can prepare the dough, let it rise overnight, and bake it the next morning. This makes it a perfect, time-saving option for fresh homemade bread with minimal effort.
Embrace the Simplicity and Flavor of Overnight Bread Recipe
The Overnight Bread Recipe is proof that great bread doesn’t need complicated techniques or hours of kneading. With just a few simple ingredients and the magic of time, you can enjoy a homemade loaf with a crispy crust and soft, airy interior. Slow fermentation enhances both flavor and texture, making every bite more delicious and nutritious.
Whether you’re a beginner or an experienced baker, this method fits effortlessly into any schedule. Embrace the ease of the Overnight Bread Recipe and wake up to fresh, bakery-quality bread every time! 🍞
Overnight Bread Recipe
Ingredients
- 3 ½ cups 440g bread flour
- 1 ½ teaspoons salt
- ¼ teaspoon instant yeast
- 1 ½ cups 360ml room-temperature water
Instructions
- Mix the Dough: In a large bowl, whisk together flour and salt. Dissolve the yeast in water, then add to the dry ingredients. Stir until combined (no kneading needed). Cover and let rest for 20 minutes.
- Bulk Fermentation: Cover the bowl and let the dough rise at room temperature for 12–18 hours until doubled and bubbly.
- Shape the Dough: Lightly flour a surface, turn out the dough, and gently shape it into a round or oval loaf. Place in a floured proofing basket or bowl lined with a towel. Let rise for 30–60 minutes.
- Preheat and Bake: Preheat the oven to 475°F (245°C). If using a Dutch oven, place it inside to heat. Transfer the dough to parchment paper, score the top, and bake for 25–30 minutes covered, then uncover and bake for another 10–15 minutes until golden brown.
- Cool and Enjoy: Let the bread cool completely on a wire rack before slicing for the best texture.
Notes
- For extra flavor, refrigerate the dough during fermentation for a cold rise.
- Add-ins like herbs, seeds, or cheese can be mixed in during the initial dough preparation.
- If your kitchen is warm, check the dough earlier to avoid over-proofing.
You May Also Like…